
Master PVC pipe installation and repair with professional techniques. Learn cutting, joining, and leak-fixing methods for durable plumbing. Essential DIY guide for homeowners and pros.
Основные выводы
This guide provides a comprehensive roadmap for successful PVC pipe installation and repair, covering essential techniques for both DIY homeowners and professionals. Understanding the correct tools is foundational, as using inappropriate equipment often leads to poor results. Mastering precise cutting methods ensures clean edges critical for watertight seals during joining. Choosing and executing the proper solvent welding or mechanical joining technique is paramount for creating durable, leak-free connections that withstand pressure. When leaks occur, effective repair solutions exist, but identifying the root cause is essential for a lasting fix. Preventing future failures involves proactive measures during installation and ongoing maintenance.
“Measure twice, cut once. Accuracy in preparation and execution prevents costly mistakes and rework later.”
Beyond installation, knowledge of reliable repair methods empowers users to address common issues like cracks or joint failures efficiently. Recognizing the distinct needs of different users is important; while homeowners benefit from clear, safe DIY procedures, professionals require insights into advanced techniques and best practices for complex scenarios. Proper planning, adherence to manufacturer instructions, and attention to detail throughout the process are non-negotiable for long-term plumbing system integrity.
“Don’t overlook pipe supports and alignment during installation. Proper physical support prevents stress points that lead to premature joint failure.”
Essential PVC Pipe Tools Overview
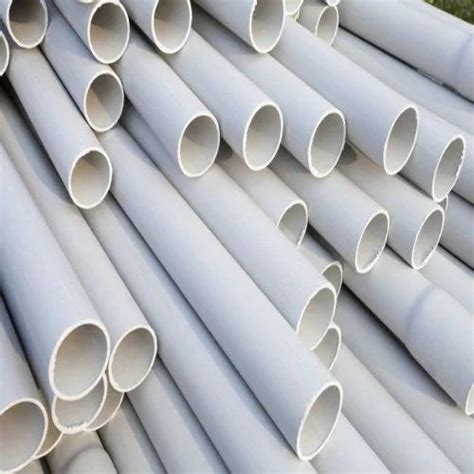
Working effectively with PVC pipes requires having the correct tools readily available. Proper preparation ensures cleaner cuts, stronger joints, and more efficient repairs, ultimately leading to a more durable plumbing system. The core toolkit encompasses items for precise measurement, cutting, joining, and finishing. For accurate sizing, a reliable tape measure is indispensable. Cutting demands tools like fine-tooth saws or specialized ratcheting PVC cutters, which produce clean, square ends essential for leak-proof connections. Deburring tools or utility knives are then necessary to remove sharp burrs and chamfer pipe ends after cutting, preventing damage to seals and ensuring smooth insertion into fittings. The joining process relies on specific chemicals: PVC primer cleans and softens the pipe surface, while PVC cement creates the solvent weld bond. Application requires appropriately sized brushes, often included with the cement can. For leak repairs, additional items like pipe repair clamps or couplings become essential. Having these fundamental tools organized streamlines the entire installation or repair process.
| Tool Category | Key Tools | Primary Function |
|---|---|---|
| Measurement | Tape Measure | Accurately determine pipe lengths and fitting placement |
| Cutting | Fine-Toothed Saw, Ratcheting PVC Pipe Cutter | Achieve straight, square cuts on pipe sections |
| Deburring/Chamfering | Deburring Tool, Utility Knife | Remove sharp edges and create a slight bevel on pipe ends |
| Cleaning/Preparation | PVC Primer, Clean Rag | Clean pipe and fitting surfaces, prepare for cement |
| Joining | PVC Cement, Applicator Brush (often included) | Solvent weld pipe and fittings together |
| Repair | Pipe Repair Clamps, Slip Couplings | Seal leaks on pressurized lines |
Mastering the use of these tools forms the foundation for the precise cutting techniques discussed next.
Precise Cutting Techniques Explained
Achieving clean, square cuts is fundamental for successful PVC pipe installations and repairs, directly impacting the integrity of subsequent joints. Using the correct tool is crucial; a fine-tooth hacksaw remains a reliable, accessible choice for most homeowners, while ratcheting PVC pipe cutters offer effortless, burr-free cuts, especially in tight spaces. For professionals handling larger volumes or diameters, power miter saws with carbide-tipped blades ensure speed and unparalleled precision. Regardless of the tool, securing the pipe firmly and marking the cut line clearly around the entire circumference prevents deviation. Focus on maintaining a straight, perpendicular cutting motion throughout the stroke. After cutting, meticulously remove all internal and external plastic burrs using a utility knife, deburring tool, or fine-grit sandpaper. This critical step ensures the pipe end fits smoothly into fittings and creates a clean surface for solvent cement to bond effectively, preventing potential leak paths caused by uneven surfaces or trapped debris. Proper preparation here sets the stage for reliable joining.
Proper Joining Methods for PVC
Following precise cutting, achieving leak-proof, durable connections is paramount for PVC plumbing systems. The primary method for permanent joints is solvent welding, which chemically fuses the pipe and fitting surfaces. This process requires applying purple primer to clean, deburred pipe ends and fitting sockets to prepare the surfaces, followed by a uniform coat of clear PVC solvent cement. Quickly insert the pipe fully into the fitting socket, giving it a quarter turn to ensure even distribution of the cement, and hold firmly for several seconds to prevent push-out. Allow the joint to cure undisturbed for the time specified by the cement manufacturer, as this bonding time is critical for achieving full strength and a watertight seal. For applications requiring disassembly, such as cleanouts or future modifications, threaded adapters paired with compatible male or female threaded fittings offer a practical solution, though thread sealant tape or paste is essential to prevent leaks at these points. Ensuring joints are correctly made during installation significantly reduces the likelihood of leaks developing later.
Leak Repair Solutions That Last
When leaks occur in PVC pipe systems, often at joints or due to impact damage, implementing a repair that ensures long-term integrity is paramount. While temporary fixes like epoxy putty or repair tape might offer a quick stopgap, they rarely provide a durable solution. For a permanent repair on pressurized lines, the recommended approach involves cutting out the damaged section. Utilize a PVC tubing cutter or fine-tooth saw to make clean, square cuts on either side of the leak. Thoroughly clean and prime the existing pipe ends and the inside of a slip coupling or a new section of pipe with couplings. Apply solvent cement generously to all mating surfaces, then immediately join the components, giving them a quarter turn to ensure even distribution of the cement. Hold firmly for 30 seconds. Crucially, allow the joint to cure fully according to the cement manufacturer’s specifications – typically 24 hours for pressure systems – before restoring water flow. This method, replicating the original installation principles, effectively restores the system’s pressure rating and prevents future failures at the repair site. Proper surface preparation and respecting curing times are the keys to a truly lasting fix.
Preventing Future Pipe Failures
Beyond immediate repairs, proactive measures significantly extend PVC plumbing system longevity and reliability. Environmental factors are critical; ensure pipes shielded from direct ultraviolet light exposure, as UV degradation weakens material over time. Proper support spacing, adhering to local codes and pipe diameter specifications, prevents sagging that can stress joints and lead to cracks. Consider potential thermal expansion and contraction during installation, particularly in exposed runs or areas with significant temperature fluctuations, allowing adequate space within hangers or using expansion joints where necessary. Avoid contact with incompatible chemicals or solvents that could compromise the pipe’s structural integrity. Regularly inspect accessible sections for early signs of stress, discoloration, or minor leaks, addressing issues promptly before they escalate. Implementing water hammer arrestors can prevent pressure surges that stress fittings and connections. Choosing the correct pressure rating (Schedule 40 or Schedule 80) for the application ensures the system handles expected operating pressures safely. Consistent adherence to these preventative practices minimizes the risk of future failures, safeguarding the investment in the plumbing infrastructure.
Professional Installation Tips Revealed
Moving beyond fundamental joining techniques, achieving truly professional and long-lasting PVC pipe installations requires attention to several critical refinements often overlooked in basic DIY approaches. Crucially, solvent welding success hinges on meticulous surface preparation; thoroughly deburring pipe ends and applying a compatible primer beforethe cement is non-negotiable for achieving the deep, molecular bond professionals rely on. Equally important is the strategic placement of pipe supports at intervals not exceeding manufacturer specifications – typically every 4 feet for horizontal 1/2-inch pipes – to prevent sagging and stress on joints over time. Furthermore, professionals always account for thermal expansion and contraction, especially in long runs or areas subject to temperature swings, by incorporating expansion loops or joints designed to absorb movement without stressing the system. Finally, allowing the full recommended cure time, which can vary significantly based on pipe diameter, cement type, and ambient temperature, before pressurizing the system is essential to ensure the joint integrity meets professional standards for durability and leak resistance. These practices collectively elevate the installation beyond mere functionality to long-term reliability.
Homeowner’s PVC Pipe Guide
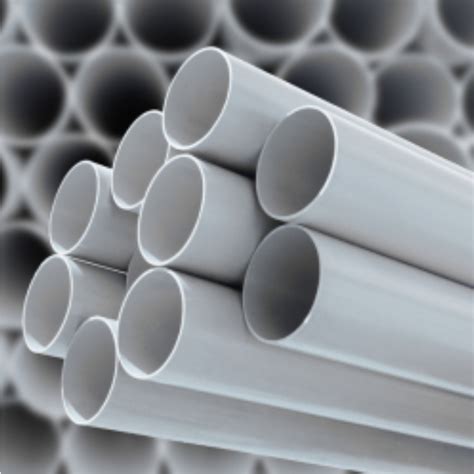
For homeowners undertaking PVC projects, understanding basic principles and safety is paramount before starting any plumbing work. Begin by carefully planning your project layout, ensuring you have accurate measurements and the correct pipe diameters and fittings. Always prioritize safety: wear protective eyewear when cutting or gluing, and ensure adequate ventilation when using solvent cement, as fumes can be hazardous. Familiarize yourself with local plumbing codes, as these dictate requirements for drain lines, venting, and potable water applications that directly impact your project’s legality and safety. While many PVC tasks are suitable for confident DIYers, recognize when a job exceeds your skill level – complex rerouting, major repairs involving pressurized lines, or connections to the main sewer often warrant calling a licensed professional to avoid costly mistakes or potential water damage. Understanding these fundamentals empowers homeowners to tackle simpler installations and repairs effectively and safely.
Proven Repair Methods Simplified
Addressing leaks or damage in PVC plumbing systems is manageable with the right approach and materials. For minor leaks, especially at joints, first ensure the pipe is dry. Apply a specialized PVC primer to the affected area, followed by a generous layer of solvent cement designed for PVC. This method effectively re-welds the joint. When dealing with a small crack or hole in the pipe wall itself, using a high-quality PVC epoxy putty offers a reliable, temporary-to-semi-permanent fix; knead the putty thoroughly, apply it firmly over the damage, and allow it to cure fully as per the manufacturer’s instructions.
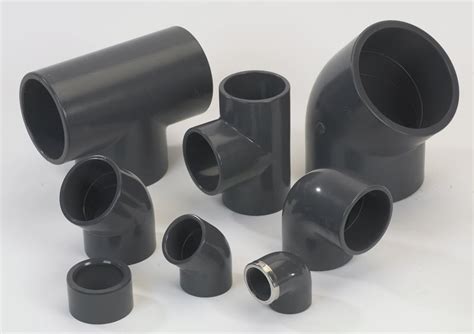
For more significant damage, such as a split section or a severely leaking joint, cutting out the compromised portion is necessary. Utilize a PVC pipe cutter to make clean, square cuts on either side of the damaged area. Then, install a slip coupling over one end of the existing pipe. Apply PVC primer and solvent cement to both the pipe end and the inside of the coupling, slide the coupling fully onto the pipe, and immediately slide it back halfway. Apply cement to the other pipe end and the remaining inside of the coupling, then slide the coupling fully over the joint to create a strong, watertight seal. Always allow adequate curing time before restoring water pressure.
Заключение
Mastering the techniques for installing and repairing PVC pipes provides significant long-term benefits for any plumbing system. The methods outlined, from precise cutting and secure joining to effective leak repair and preventative maintenance, form the foundation for durable and reliable performance. Applying these professional approaches consistently minimizes the risk of future failures, saving considerable time, expense, and inconvenience. Whether tackling a simple DIY project or overseeing a more complex installation, adhering to these proven principles ensures the integrity of your PVC pipe network. This knowledge empowers homeowners to handle common issues confidently and equips professionals with the standards for lasting results, ultimately contributing to efficient and trouble-free plumbing operations.
Frequently Asked Questions
Q: How long should PVC cement cure before pressurizing the pipe?
A: Allow 15 minutes for initial set and 2 hours for full handling strength. Wait 24 hours before subjecting joints to full system pressure for maximum reliability.
Q: Can PVC pipes freeze and crack?
A: Yes. Water expands when frozen, creating internal pressure. While PVC resists freezing better than metal, always insulate pipes in unheated spaces and maintain temperatures above 32°F (0°C).
Q: What’s the difference between PVC and CPVC pipes?
A: PVC (Polyvinyl Chloride) is for cold water and drainage (max 140°F/60°C). CPVC (Chlorinated Polyvinyl Chloride) handles both hot and cold water distribution (up to 200°F/93°C) due to its chlorination.
Q: Can I use PVC for compressed air systems?
A: Standard PVC isn’t recommended. Air compression creates heat and pressure surges, increasing rupture risk. Use pipes specifically rated for compressed air, like Schedule 80 PVC or metal alternatives.
Q: Why does my new PVC joint leak after assembly?
A: Common causes include insufficient cement application, improperly cleaned/deburred pipe ends, inadequate insertion depth, or disturbance before curing. Always follow manufacturer instructions precisely.
Q: How do I repair a leaking PVC joint without cutting?
A: For small leaks at joints, drain the pipe, dry thoroughly, and apply epoxy putty or specialized PVC repair tape as a temporary fix. Permanent repair requires cutting out and replacing the faulty section.
Q: Are PVC pipes resistant to chemical damage?
A: PVC offers excellent resistance to acids, bases, salts, and alcohols. However, it can degrade with prolonged exposure to certain solvents, fuels, or essential oils. Always check chemical compatibility charts.