
Master PVC pipe installation with professional techniques. Learn precise cutting, solvent welding, and secure joining methods. Troubleshoot common issues using expert-approved solutions for durable plumbing systems.
Key Takeaways
This guide consolidates critical professional practices for successful PVC pipe installation, providing a foundation for the detailed techniques covered in subsequent sections. Mastering these core principles significantly enhances system reliability and longevity. Critically, meticulous surface preparation and precise cutting form the bedrock of leak-proof joints, directly impacting the effectiveness of solvent welding. Furthermore, understanding the nuances of solvent cement application and the critical assembly window is paramount for achieving optimal fusion. Proactive troubleshooting strategies, informed by recognizing common failure modes like incomplete fusion or dry joints, enable swift rectification during installation rather than post-failure. Finally, rigorous adherence to pressure testing protocols remains the definitive method for verifying joint integrity and overall system durability before commissioning.
| Core Skill Area | Essential Professional Takeaway |
|---|---|
| Surface Preparation | Clean and deburr pipe ends thoroughly; ensure surfaces are free from contaminants and moisture. |
| Cutting Precision | Achieve square, smooth cuts using sharp, appropriate tools to prevent joint stress points. |
| Solvent Cementing | Apply cement evenly and quickly; assemble joints within the cement’s stated working time. |
| Joint Integrity | Push pipe fully to the base of the fitting socket and hold firmly to prevent pull-out during cure. |
| Proactive Checks | Visually inspect every joint for complete cement coverage and proper insertion depth immediately after assembly. |
PVC Pipe Installation Preparation Essentials
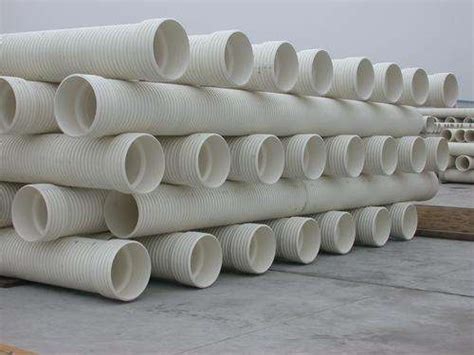
Proper preparation forms the foundation for a successful and durable PVC plumbing system installation. Before any cutting or joining begins, meticulous verification of all materials is paramount. Ensure all PVC pipes, fittings, and solvent cement precisely match the project specifications, including correct diameter, pressure rating (schedule), and are designated for the intended application (potable water, drainage, etc.). Inspect each component visually for any defects such as cracks, gouges, or excessive ovality that could compromise integrity. Simultaneously, prepare the workspace: ensure adequate ventilation for solvent welding, clear obstructions for safe handling of long pipe lengths, and establish a clean, stable surface for assembly. Gather all necessary tools – pipe cutters, deburring tools, measuring tape, applicators, and clean raps – ensuring they are readily accessible. Finally, confirm that appropriate personal protective equipment (PPE), including safety glasses and chemical-resistant gloves, is available and used. This thorough groundwork minimizes errors and hazards during the subsequent installation phases.
Mastering PVC Pipe Cutting Precision
Accurate cutting forms the critical foundation for successful PVC pipe installations, as uneven ends compromise joint integrity. Professionals typically employ ratcheting tubing cutters for diameters under 2 inches, ensuring clean perpendicular cuts without deformation. For larger pipes, power saws with carbide-tipped blades deliver efficient results when used with miter boxes to maintain 90-degree angles. Regardless of tool selection, deburring both inner and outer edges with a utility knife or specialized reamer is non-negotiable—this removes micro-shards that create leak paths during solvent welding. Measurements must account for pipe insertion depth into fittings, typically adding 1/2 inch to the marked length. Neglecting these steps risks incomplete cement fusion and premature joint failure, directly undermining system pressure ratings. Consistent cutting discipline directly enables the subsequent solvent welding phase.
Professional Solvent Welding Techniques
Achieving strong, permanent joints in PVC plumbing systems relies heavily on mastering solvent welding. This process chemically fuses pipe and fitting surfaces, creating a monolithic bond superior to mechanical connections. Begin by ensuring both surfaces are meticulously clean, dry, and free of burrs left from cutting; any debris compromises adhesion. Apply a uniform coat of the correct PVC primer – typically purple or clear – to both the pipe end and the fitting socket. The primer cleans and slightly softens the PVC, preparing it for the cement. Before the primer dries, apply a thin, even layer of approved PVC cement to both surfaces. Immediately insert the pipe into the fitting socket with a firm, twisting motion to distribute the cement evenly and eliminate air pockets. Hold the joint firmly together without movement for 15-30 seconds to prevent push-out. Crucially, allow the joint to cure undisturbed for the manufacturer-recommended time – often several minutes before handling and hours before pressure testing – as this undisturbed curing period is vital for developing full bond strength and long-term joint integrity. Work in a well-ventilated area due to strong solvent fumes.
Achieving Leak-Proof PVC Joints
Properly prepared joints are fundamental to preventing leaks in PVC plumbing systems. After precise cutting and chamfering, surface preparation becomes critical. Thoroughly clean both the pipe end and fitting socket using PVC cleaner to remove dirt, grease, or moisture, ensuring optimal conditions for solvent cement bonding. Apply primer evenly to soften surfaces, typically purple or clear, following manufacturer instructions for coverage and drying time. Next, apply a uniform, generous coat of solvent cement to both surfaces. Work efficiently, as cement sets quickly. Immediately insert the pipe fully into the fitting socket, giving it a quarter-turn to distribute the cement evenly. Hold the joint firmly for 15-30 seconds to prevent push-out while initial bonding occurs. Avoid disturbing joints during the recommended curing period, which varies based on pipe size, temperature, and humidity. Finally, inspect each joint visually for a continuous bead of cement around the entire circumference, indicating proper application and sealing. This meticulous process ensures molecular fusion between pipe and fitting, creating reliable, leak-free connections essential for system integrity.
Troubleshooting Common Installation Issues
Despite meticulous preparation and execution, certain challenges can emerge during PVC pipe installations. Experienced professionals understand that identifying the root cause is essential for effective resolution. A frequent issue involves improper joint seating or misalignment, often resulting from inadequate chamfering or insufficient insertion depth into the fitting socket during solvent welding. This typically manifests as leaks during initial pressure testing or visible gaps. Another common problem stems from incorrect solvent cement application – either too little cement failing to create a full bond, or excessive cement causing blockage or weakening the joint internally. Pipe deformation, such as ovality or bending, often induced by improper support during installation or exposure to high temperatures before the joint fully cures, can also lead to compromised seals and stress points. Diagnosing these issues involves careful visual inspection for gaps, uneven cement distribution, or physical distortion, followed by systematic pressure testing to pinpoint failure locations before implementing corrective measures.
Fixing Common PVC Joint Failures
Even with meticulous preparation and execution, PVC joints can sometimes fail, leading to leaks or separation. Prompt identification and correction are essential for system integrity. When encountering a leaking joint, the first step is to thoroughly dry the area and inspect the connection. Often, minor leaks at new joints stem from insufficient solvent cement application or inadequate curing time. In such cases, carefully disassembling the joint, cleaning off all old cement residue from both pipe and fitting socket using fine-grit sandpaper, and reapplying fresh solvent cement correctly can resolve the issue. Ensure surfaces are clean, dry, and properly primed before re-cementing.
For joints that have separated completely, the cause is frequently insufficient insertion depth during assembly. The pipe must be fully seated to the bottom of the fitting socket. Repair involves cutting out the failed section entirely. Use a tubing cutter for a clean, square cut on both sides of the joint. Measure meticulously to account for the insertion depth of new couplings or fittings, ensuring the replacement pipe section is the correct length.
Always chamfer the cut pipe ends before applying cement. This slight bevel eases insertion into fittings and helps prevent pushing solvent cement ahead of the pipe, which can create voids and weak spots in the bond.
More persistent leaks or failures might indicate improper cement selection (e.g., using regular cement on Schedule 80 pipe without the appropriate heavy-duty variant), contamination of surfaces during assembly, or damage to the pipe or fitting itself. Assess the joint carefully; if the fitting or pipe shows cracks, deformation, or signs of chemical attack, replacement is the only reliable solution. Properly executed repairs restore joint strength and prevent future leaks within the plumbing system.
Ensuring Long-Term Plumbing System Durability
Maintaining the integrity of PVC plumbing systems over decades requires proactive measures beyond the initial installation. Regular visual inspections are fundamental; check exposed pipes quarterly for signs of stress, discolouration indicating UV degradation, or unexpected movement at support points. Ensuring adequate support spacing, typically every 32 inches for horizontal runs and 48 inches for vertical, prevents sagging that strains joints and leads to premature failure. Protect pipes in areas subject to freezing by adding insulation sleeves or heat tape, as while PVC resists bursting better than metal, extreme cold can still cause brittleness. Avoid direct, prolonged sunlight exposure for outdoor installations by using UV-resistant PVC formulations or protective conduit, as standard PVC degrades under ultraviolet radiation. Furthermore, schedule periodic flushing to remove sediment buildup that can abrade pipe interiors over time. Addressing minor leaks immediately using appropriate solvent cement or couplings prevents water damage and structural weakening. Consider thermal expansion and contraction in long runs; install expansion joints or loops where significant temperature fluctuations occur to prevent buckling or stress fractures. Implementing these systematic maintenance practices significantly extends the service life and reliability of the entire plumbing network.
Final PVC System Pressure Testing Guide
Following secure joint assembly and curing, rigorous pressure testing validates the integrity of the entire PVC plumbing system. This critical step confirms the effectiveness of installation techniques and ensures long-term reliability before placing the system into service. Industry best practices mandate testing the system at 1.5 times its intended maximum operating pressure, adhering strictly to local plumbing codes and ASTM standards for duration, typically ranging from 24 to 48 hours for thorough assessment.
Gradual pressurization is essential; slowly increase pressure using clean water to the designated test level, avoiding sudden surges that could stress untested joints. Maintain constant pressure throughout the test period, meticulously monitoring gauges for any indication of pressure decay, which signals potential leaks. Concurrently, conduct a comprehensive visual inspection of every joint, valve, and fitting, paying close attention to solvent-welded connections and threaded adapters for the slightest moisture or weeping. Applying a soap solution to joints can help pinpoint tiny leaks by forming visible bubbles.
Isolate any detected leaks immediately by depressurizing the system completely. After repairs, retest the entire section to confirm a successful resolution. A successful pressure test, with no measurable pressure drop and no visible leaks, provides definitive assurance that the installation meets professional standards and is ready for reliable, durable operation under expected service conditions. This final verification step is indispensable for identifying potential failure points before concealed installation or system activation.
Conclusion
Successfully installing PVC piping systems requires meticulous attention to detail at every stage, from initial preparation through to the final pressure test. By mastering precise cutting techniques, applying solvent welding correctly, and ensuring leak-proof joints, professionals build the foundation for reliable and long-lasting plumbing. Addressing common issues proactively during installation minimizes future failures and costly repairs. Adherence to manufacturer specifications and industry best practices is paramount. Ultimately, the durability and performance of the entire system hinge on the quality of the installation work performed. Consistent application of the techniques covered ensures plumbing networks meet functional demands and withstand the test of time.
Frequently Asked Questions
What is the minimum cure time required for solvent-welded PVC joints before pressure testing?
Allow at least 24 hours for full curing before conducting pressure tests, particularly for larger diameter pipes. Temperature and humidity significantly impact curing speed – lower temperatures require extended setting periods.
Why do professionals recommend using both cleaner and primer before solvent cement application?
PVC cleaner removes surface contaminants like dirt and grease, while primer chemically softens the pipe surface. This dual preparation creates optimal molecular bonding conditions, significantly enhancing joint integrity and long-term leak resistance.
How can I prevent issues when cutting PVC pipe in cold weather?
Use fine-tooth blades specifically designed for plastics and make slower cutting motions. Cold temperatures increase PVC’s brittleness, raising fracture risks. Store pipes indoors before cutting and allow them to reach ambient workspace temperature.
What causes hairline cracks at joint connections after installation?
This typically indicates improper joint preparation or assembly. Common causes include insufficient cleaning, applying too little cement, incomplete insertion depth, or rotating the pipe after connection. Always follow the manufacturer’s insertion depth markings precisely.
Can solvent cement be used to repair leaking joints after assembly?
No, surface-applied cement cannot effectively repair leaking joints. The compromised connection must be cut out entirely. Install a new coupling with properly prepared and cemented joints to ensure a permanent, pressure-rated seal.